A step-by-step guide where we will show you how easy it is to assign courses to your employees.
Assignments help you assign courses to your employees. Say you want everyone with a position on deck to have a group of courses with a blend of STCW training and your company-specific training – or all chefs should have the latest training in healthy cooking. Assignments will help you with this.
Assignments will also help you make sure that employees complete their training within a given time frame. Notifications are sent to the participants about upcoming deadlines and what courses they are supposed to take – Everything in a clear and concise way.
Getting Started
Before getting started, it's good to take a step back and figure out what kind of training you need within your organization. Should the assignment be aimed at all employees or certain positions? Will you have some courses designated for everyone, or are there more specific course needs throughout the organization?
With this information ready, it's easy to get started creating your assignments. Just create a "New Assignment" and give it a name, then go through these four steps:
1. Add Participants
First, you select the assignment's participants. The participants can be selected either automatically or manually. With an automatic assignment, new participants will be added continually if they match your preset conditions. With a manual selection, you select each participant individually. More about participants here
2. Select Courses
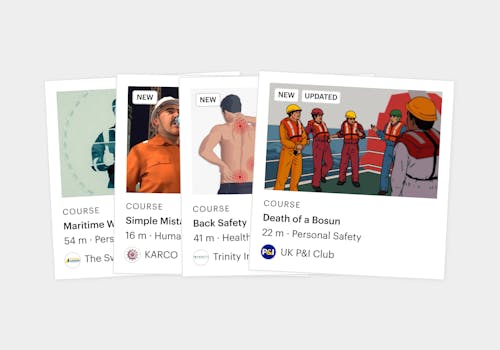
Next, select the courses you think your participants should complete. You can select among all courses from Seably Marketplace and from all private courses you have published. Remember that assignments is smart – so if some participants already have completed the courses you are selecting, we will only notify them once, so don't worry about any overlapping information. More about selecting courses here
3. Fine-tune Settings
The last step is settings. Here you can fine-tune the details, decide who should be selected as the assignment sender, set deadlines, and decide how your participants should be notified. Notifications can be sent out via email, SMS, and push notifications. Deadlines can be defined with either a fixed date (same deadline for all participants) or a period deadline (relative for each participant starting from when they are notified about the assignment). More about assignment settings here
4. Start the Assignment
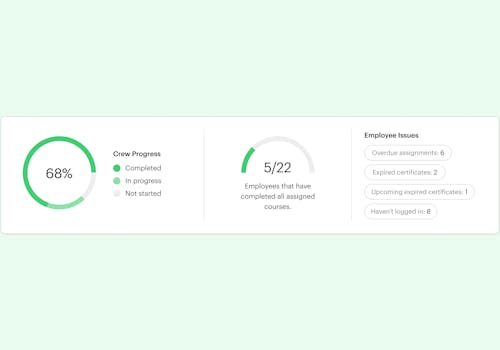
When you're happy with your assignment, click "Start now," and the assignment will go live. All the participants get their individual information and receive notifications about courses and deadlines. You, on the other hand, will start to see progress data in the "Overview" tab.
Easy right?