This feature update is all about libraries, and we’re not talking floor-to-ceiling books. We’re talking about a small but mighty addition to our platform that means the administrator can group courses into organised and categorised ‘libraries’, so you can quickly and easily make certain courses visible to some or all of your employees. Good right?
Just as you might put your thrillers and your historical fiction on separate shelves, the Seably library feature will allow you to group any number of courses, such as for ‘onboarding’ or ‘health and safety’ or courses for a certain vessel type, into separate ‘folders’ or libraries. With just one time-saving click, a group of courses can be quickly and easily assigned to an employee or a whole group of employees to complete.
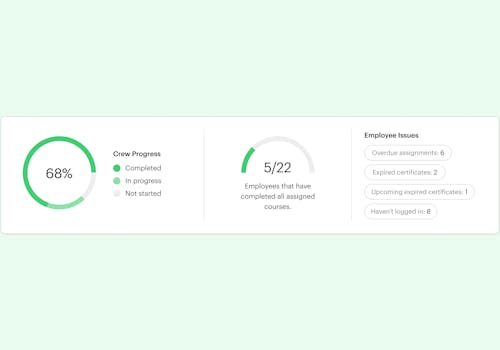
This makes it much easier to ensure nothing is missed, especially when you are dealing with a large number of staff and a lot of different vessel types, ensuring all employees get access to the right set of courses.
How to Setup Course Libraries
1. To create your library and assign courses, first, click into Builder and then click on the Libraries tab.
2. Create a New Library using the button on the top right and give your library a relevant name.
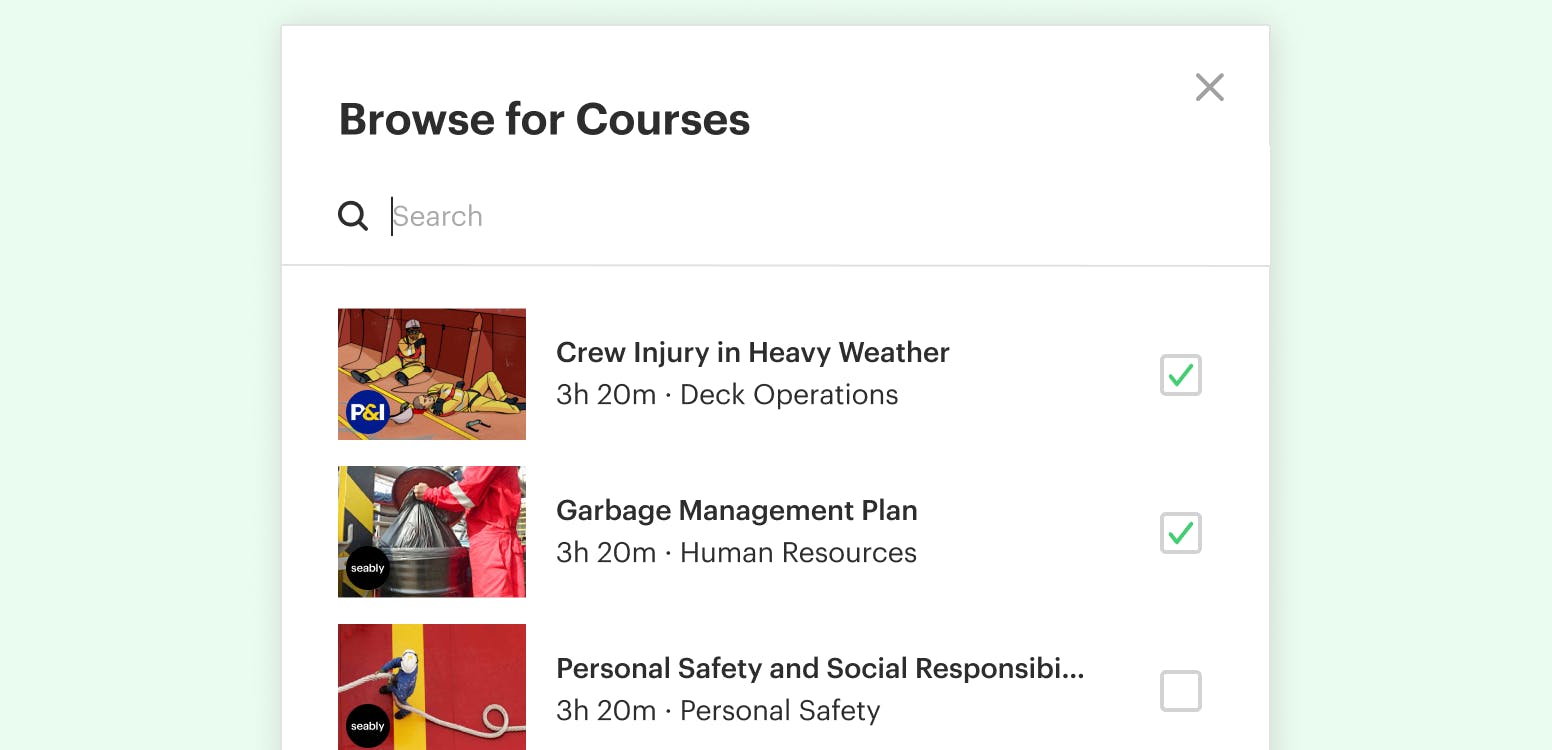
3. Add courses to your library by simply clicking on Add Courses and scrolling through putting a tick next to the ones you’d like to add.
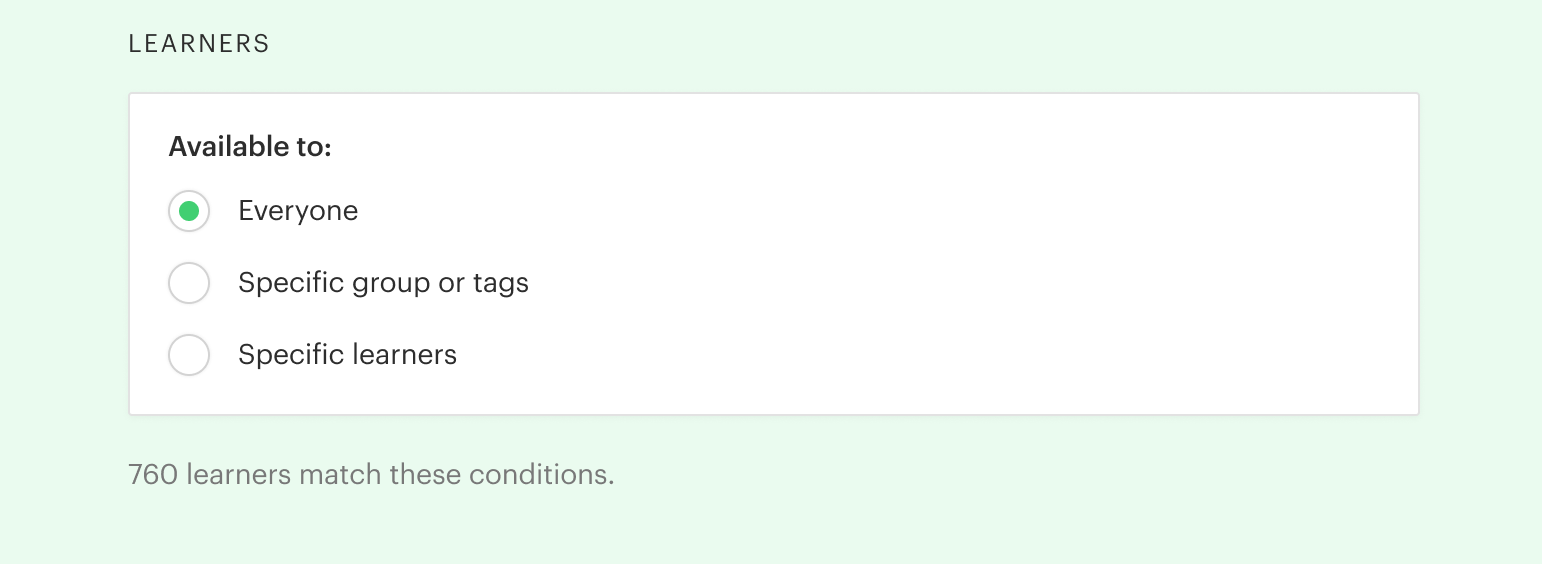
4. Allocate your library to employees. When you have gathered your courses together, scroll down this page to Employees. Here you will get the option to assign your new library to everyone, a specific group or a specific employee.
If you want to allocate your library to a specific group of employees, you can choose to assign it to employees with ‘All conditions’ or ‘Some conditions’.
The ‘conditions’ will be the same identifying features that you chose when you set up each group, such as vessel, site or position.
- All conditions will assign the library to employees who meet all the criteria you tick.
- Some conditions will assign the library to employees who meet ANY of the criteria you tick.
You can also choose 'Specific learners’ which will enable you to individually tick the names of the employees who you would like to complete the courses in the library.
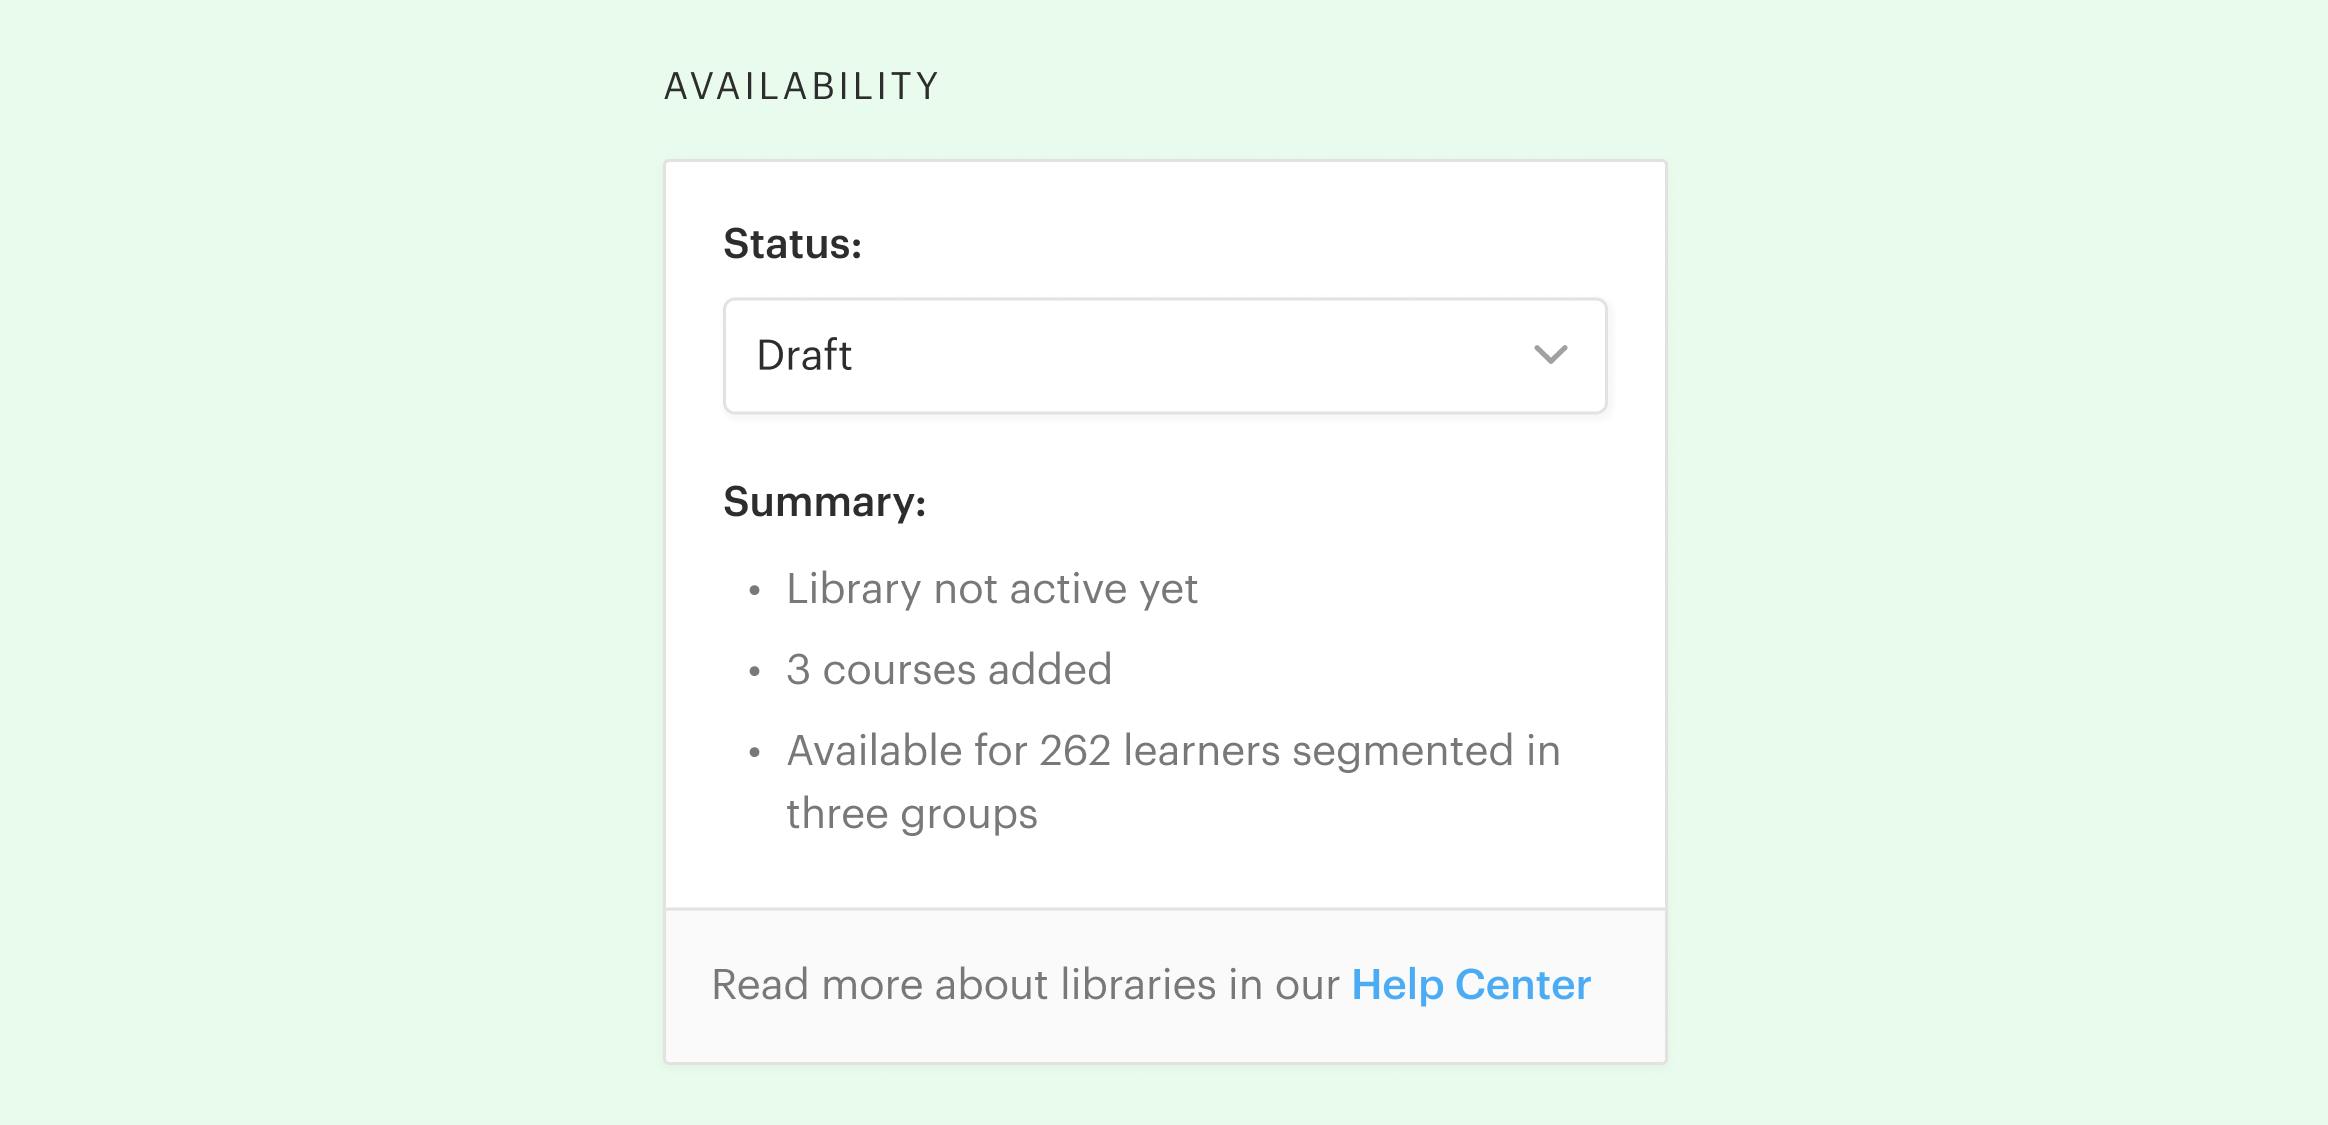
5. You’re nearly done! All that remains is to make the library live! On the right-hand side, change the status from Draft to Active and Save Changes (top right).
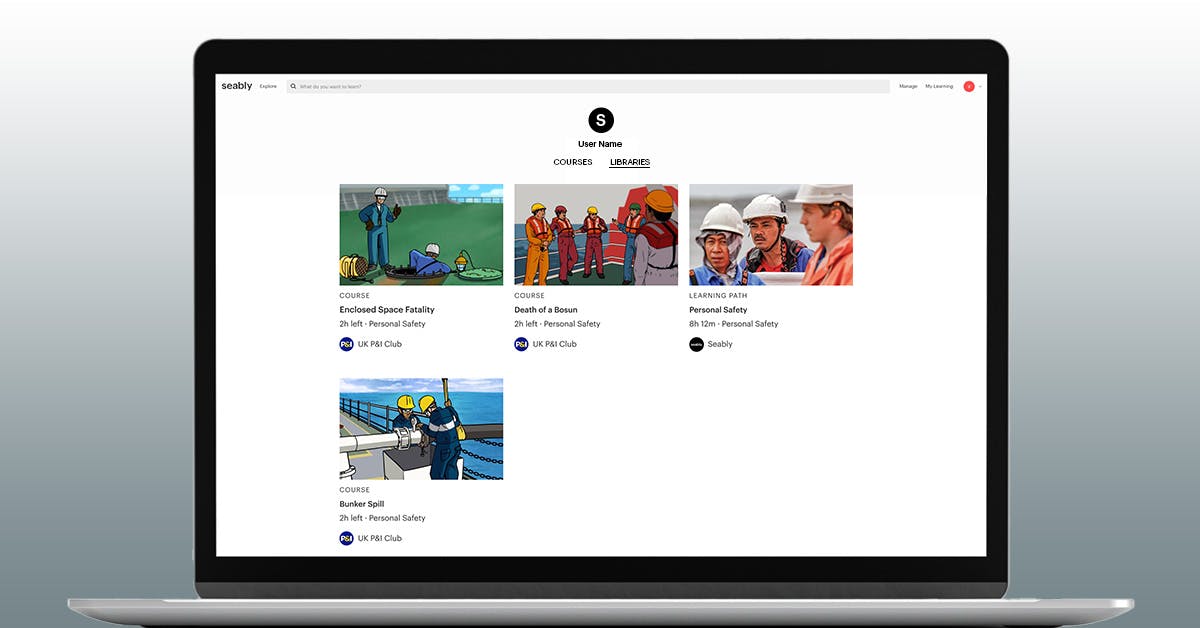
6. Your employees will receive a notification that they have access to a library of courses. When they next look at ‘My Learning' in Seably, clicking the ‘Libraries’ tab (next to ‘Courses’) will show all the Libraries they have access to.
7. You can sit back and watch the certifications roll in.
Do let us know if you have any questions on this or other features and don’t forget to sign up to receive all updates on new features, courses and course providers.